5.3. Demonstrations
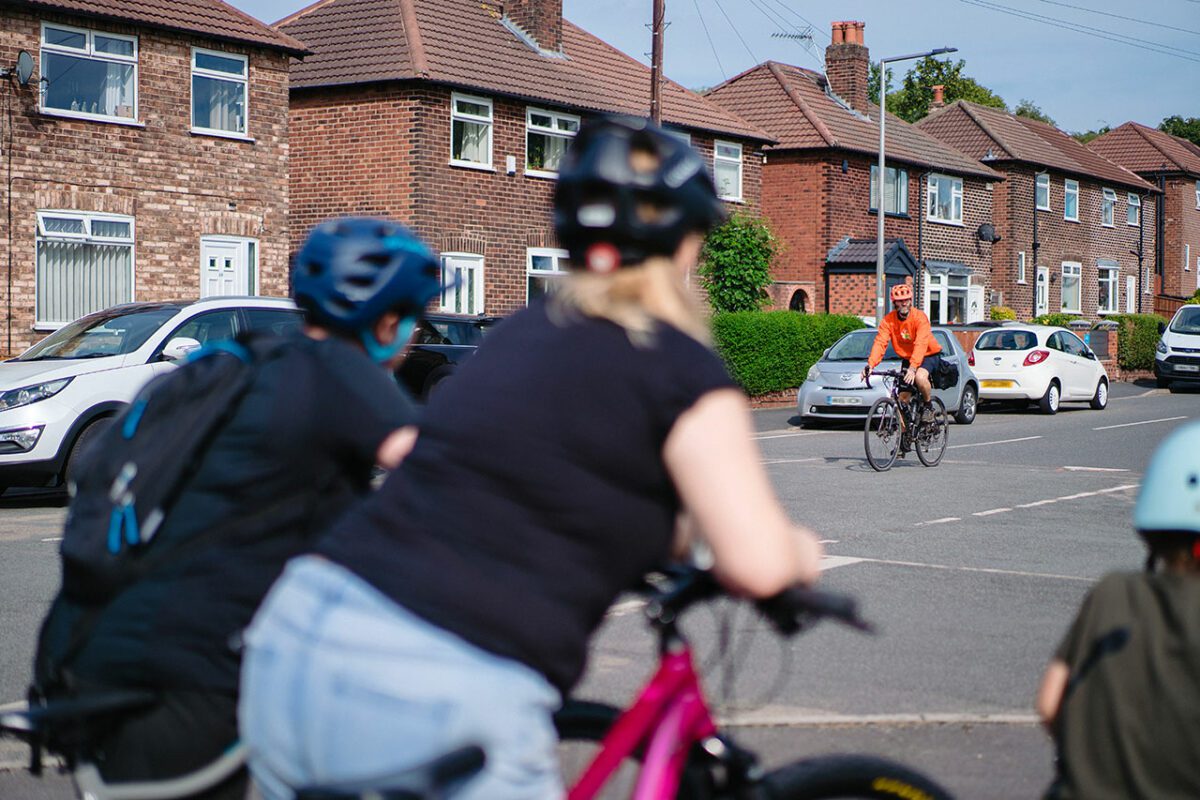
You will need to demonstrate most activities to your riders. This is to show them how to complete an manoeuvre as clearly as possible, and is normally the first thing you will do with them at a training site. Teaching strategies for non-visual learners should also be used if needed, generally after you have completed the demonstration.
All demonstrations must be realistic and exemplary: they should follow the guidance of the National Standard and relate to real traffic movements on the road. Demonstrations should be cycled, not walked.
Make sure all riders can see what you’re doing. Think about where you have asked them to stand – is this the position of ‘maximum visibility’? If you are working with another instructor, they can involve the riders in the demonstration by asking them questions throughout. If you are working on your own, ask the riders questions before and after, and give them specific things to look out for.
For a demonstration to be as clear as possible to those watching, it should be carried out by one person; having additional riders involved may distract or obstruct the view of those watching and increase the level of risk unnecessarily. Exceptions may include when you are deliberately showing how two riders may negotiate a junction or the situation naturally develops on the road with other road users present who are not involved in training.
Using riders to provide demonstrations:
Sometimes you may want to ask a rider to give a demonstration.
Before you decide to do this, you need to make sure that:
- the rider has the right skills and will give a good demonstration, and doesn’t give the wrong impression to those watching
- the levels of risk are low
- you are mainly using this approach during Level 1 training
If you ask a rider to give a demonstration during Level 2 or 3, it’s especially important that you take care to reduce risks. Demonstrations should take place with low traffic volume and low average traffic speed. Another good strategy is to use a rider demonstration later in the session. This will give you the chance to see what each rider can do, and allow you, the instructor, to give them an exemplary demonstration first.
Buddy riding
You can use ‘buddy riding’ to support those who may need more help, or as an effective tool with smaller groups. This can be as instructor:rider or rider:rider, and is effective when a less confident rider is paired with a more confident and competent rider. This is an active learning strategy to provide more support to a rider or teach dynamically. When buddy riding, instructors should ensure that:
- wider group management is not compromised
- the instructor effectively manages risk of the trainee rider
- the less confident rider is placed in front or to the left of the more confident rider, so they can be seen clearly, and provided with verbal instruction and support
- independent decision making is encouraged
Instructors may in some cases ride a manoeuvre with a rider following them. This is a differentiation technique used when a rider needs individual support to understand road position and when to look and signal, and the instructor feels like the rider needs a ‘wheel to follow.’ This can be provided by more confident riders, or the instructor themselves, with a co-instructor managing the other riders.